from flask import Flask, request, jsonify
import requests
import time
import uuid
import logging
import json
from typing import Dict, Any
from datetime import datetime, UTC
logging.basicConfig(
level=logging.INFO,
format='%(asctime)s [%(levelname)s] %(message)s',
handlers=[logging.StreamHandler()]
)
logger = logging.getLogger(__name__)
app = Flask(__name__)
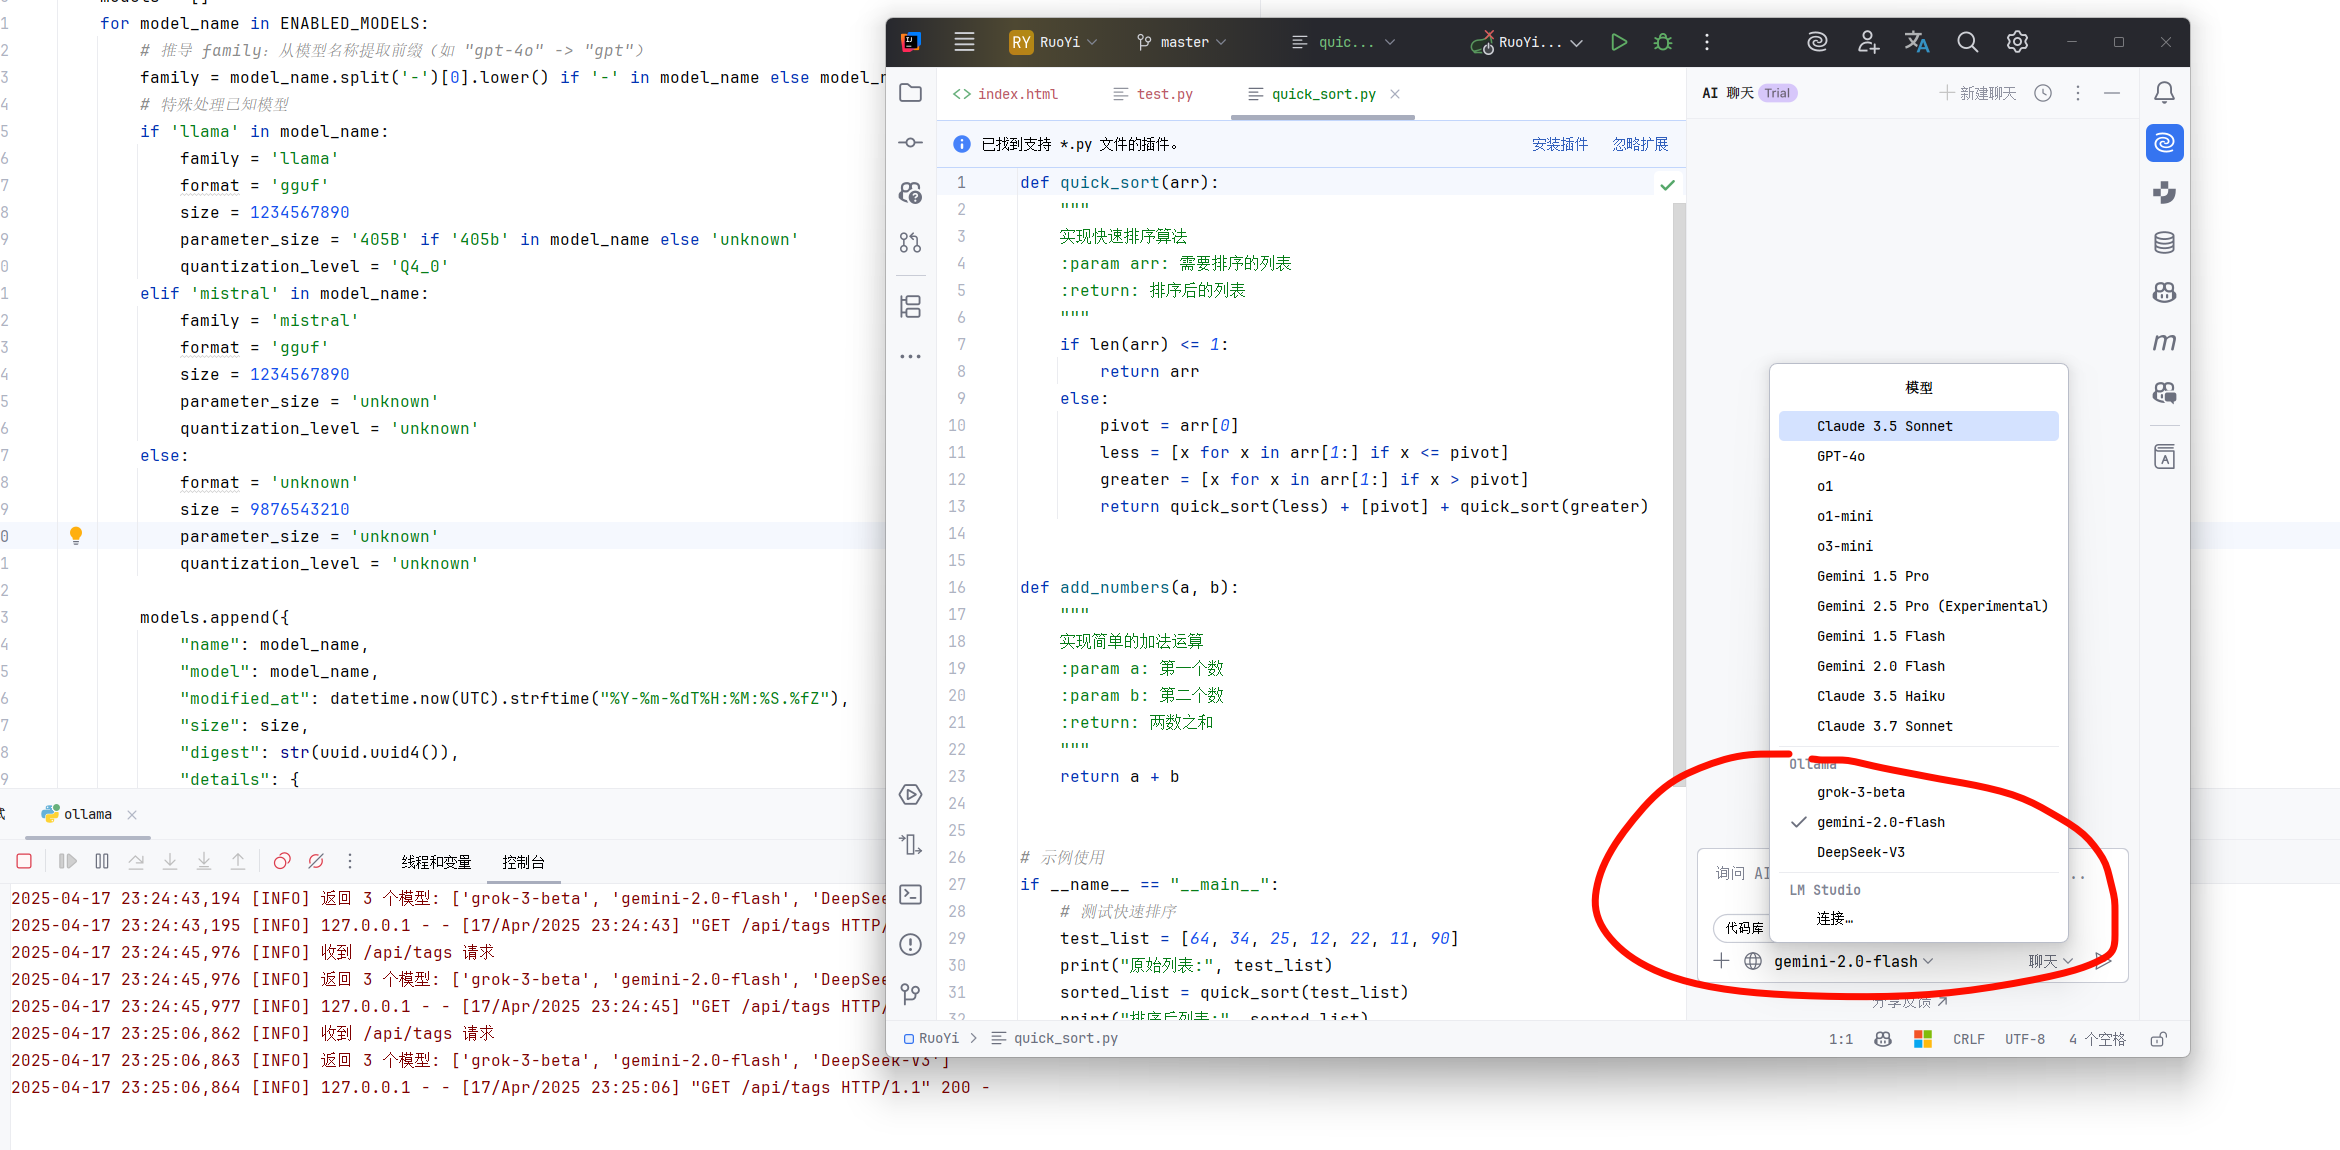
ENABLED_MODELS = {
"gemini-2.0-flash",
"grok-3-beta",
"DeepSeek-V3"
}
API_URL = "https://xxxx/v1/chat/completions"
API_KEY = "xxxxx"
OLLAMA_MOCK_RESPONSES = {
"What is the capital of France?": "The capital of France is Paris.",
"Tell me about AI.": "AI is the simulation of human intelligence in machines, enabling tasks like reasoning and learning.",
"Hello": "Hi! How can I assist you today?"
}
@app.route("/", methods=["GET"])
def root_endpoint():
"""模拟 Ollama 根路径,返回 'Ollama is running'"""
logger.info("收到根路径请求")
return "Ollama is running", 200
@app.route("/api/tags", methods=["GET"])
def tags_endpoint():
"""模拟 Ollama 的 /api/tags 端点,动态生成启用模型列表"""
logger.info("收到 /api/tags 请求")
models = []
for model_name in ENABLED_MODELS:
family = model_name.split('-')[0].lower() if '-' in model_name else model_name.lower()
if 'llama' in model_name:
family = 'llama'
format = 'gguf'
size = 1234567890
parameter_size = '405B' if '405b' in model_name else 'unknown'
quantization_level = 'Q4_0'
elif 'mistral' in model_name:
family = 'mistral'
format = 'gguf'
size = 1234567890
parameter_size = 'unknown'
quantization_level = 'unknown'
else:
format = 'unknown'
size = 9876543210
parameter_size = 'unknown'
quantization_level = 'unknown'
models.append({
"name": model_name,
"model": model_name,
"modified_at": datetime.now(UTC).strftime("%Y-%m-%dT%H:%M:%S.%fZ"),
"size": size,
"digest": str(uuid.uuid4()),
"details": {
"parent_model": "",
"format": format,
"family": family,
"families": [family],
"parameter_size": parameter_size,
"quantization_level": quantization_level
}
})
logger.info(f"返回 {len(models)} 个模型: {[m['name'] for m in models]}")
return jsonify({"models": models}), 200
def generate_ollama_mock_response(prompt: str, model: str) -> Dict[str, Any]:
"""生成模拟的 Ollama 聊天响应,符合 /api/chat 格式"""
response_content = OLLAMA_MOCK_RESPONSES.get(
prompt, f"Echo: {prompt} (这是来自模拟 Ollama 服务器的响应。)"
)
return {
"model": model,
"created_at": datetime.now(UTC).strftime("%Y-%m-%dT%H:%M:%SZ"),
"message": {
"role": "assistant",
"content": response_content
},
"done": True,
"total_duration": 123456789,
"load_duration": 1234567,
"prompt_eval_count": 10,
"prompt_eval_duration": 2345678,
"eval_count": 20,
"eval_duration": 3456789
}
def convert_api_to_ollama_response(api_response: Dict[str, Any], model: str) -> Dict[str, Any]:
"""将 API 的 OpenAI 格式响应转换为 Ollama 格式"""
try:
content = api_response["choices"][0]["message"]["content"]
total_duration = api_response.get("usage", {}).get("total_tokens", 30) * 1000000
prompt_tokens = api_response.get("usage", {}).get("prompt_tokens", 10)
completion_tokens = api_response.get("usage", {}).get("completion_tokens", 20)
return {
"model": model,
"created_at": datetime.now(UTC).strftime("%Y-%m-%dT%H:%M:%SZ"),
"message": {
"role": "assistant",
"content": content
},
"done": True,
"total_duration": total_duration,
"load_duration": 1234567,
"prompt_eval_count": prompt_tokens,
"prompt_eval_duration": prompt_tokens * 100000,
"eval_count": completion_tokens,
"eval_duration": completion_tokens * 100000
}
except KeyError as e:
logger.error(f"转换API响应失败: 缺少键 {str(e)}")
return {"error": f"无效的API响应格式: 缺少键 {str(e)}"}
def print_request_params(data: Dict[str, Any], endpoint: str) -> None:
"""打印请求参数"""
model = data.get("model", "未指定")
temperature = data.get("temperature", "未指定")
stream = data.get("stream", False)
messages_info = []
for msg in data.get("messages", []):
role = msg.get("role", "未知")
content = msg.get("content", "")
content_preview = content[:50] + "..." if len(content) > 50 else content
messages_info.append(f"[{role}] {content_preview}")
params_str = {
"端点": endpoint,
"模型": model,
"温度": temperature,
"流式输出": stream,
"消息数量": len(data.get("messages", [])),
"消息预览": messages_info
}
logger.info(f"请求参数: {json.dumps(params_str, ensure_ascii=False, indent=2)}")
@app.route("/api/chat", methods=["POST"])
def ollama_chat_endpoint():
"""模拟 Ollama 的 /api/chat 端点,所有模型都能使用"""
try:
data = request.get_json()
if not data or "messages" not in data:
logger.error("无效请求: 缺少 'messages' 字段")
return jsonify({"error": "无效请求: 缺少 'messages' 字段"}), 400
messages = data.get("messages", [])
if not messages or not isinstance(messages, list):
logger.error("无效请求: 'messages' 必须是非空列表")
return jsonify({"error": "无效请求: 'messages' 必须是非空列表"}), 400
model = data.get("model", "llama3.2")
user_message = next(
(msg["content"] for msg in reversed(messages) if msg.get("role") == "user"),
""
)
if not user_message:
logger.error("未找到用户消息")
return jsonify({"error": "未找到用户消息"}), 400
print_request_params(data, "/api/chat")
logger.info(f"处理 /api/chat 请求, 模型: {model}")
api_request = {
"model": model,
"messages": messages,
"stream": False,
"temperature": data.get("temperature", 0.7)
}
headers = {
"Content-Type": "application/json",
"Authorization": f"Bearer {API_KEY}"
}
try:
logger.info(f"转发请求到API: {API_URL}")
response = requests.post(API_URL, json=api_request, headers=headers, timeout=30)
response.raise_for_status()
api_response = response.json()
ollama_response = convert_api_to_ollama_response(api_response, model)
logger.info(f"收到来自API的响应,模型: {model}")
return jsonify(ollama_response), 200
except requests.RequestException as e:
logger.error(f"API请求失败: {str(e)}")
logger.info(f"使用模拟响应作为备用方案,模型: {model}")
response = generate_ollama_mock_response(user_message, model)
return jsonify(response), 200
except Exception as e:
logger.error(f"/api/chat 服务器错误: {str(e)}")
return jsonify({"error": f"服务器错误: {str(e)}"}), 500
@app.route("/v1/chat/completions", methods=["POST"])
def api_chat_endpoint():
"""转发到API的 /v1/chat/completions 端点,并转换为 Ollama 格式"""
try:
data = request.get_json()
if not data or "messages" not in data:
logger.error("无效请求: 缺少 'messages' 字段")
return jsonify({"error": "无效请求: 缺少 'messages' 字段"}), 400
messages = data.get("messages", [])
if not messages or not isinstance(messages, list):
logger.error("无效请求: 'messages' 必须是非空列表")
return jsonify({"error": "无效请求: 'messages' 必须是非空列表"}), 400
model = data.get("model", "grok-3")
user_message = next(
(msg["content"] for msg in reversed(messages) if msg.get("role") == "user"),
""
)
if not user_message:
logger.error("未找到用户消息")
return jsonify({"error": "未找到用户消息"}), 400
print_request_params(data, "/v1/chat/completions")
logger.info(f"处理 /v1/chat/completions 请求, 模型: {model}")
headers = {
"Content-Type": "application/json",
"Authorization": f"Bearer {API_KEY}"
}
try:
logger.info(f"转发请求到API: {API_URL}")
response = requests.post(API_URL, json=data, headers=headers, timeout=30)
response.raise_for_status()
api_response = response.json()
ollama_response = convert_api_to_ollama_response(api_response, model)
logger.info(f"收到来自API的响应,模型: {model}")
return jsonify(ollama_response), 200
except requests.RequestException as e:
logger.error(f"API请求失败: {str(e)}")
return jsonify({"error": f"API请求失败: {str(e)}"}), 500
except Exception as e:
logger.error(f"/v1/chat/completions 服务器错误: {str(e)}")
return jsonify({"error": f"服务器错误: {str(e)}"}), 500
def main():
"""启动模拟服务器"""
logger.info("正在启动模拟 Ollama 和 API 代理服务器,地址: http://localhost:11434")
app.run(host="0.0.0.0", port=11434, debug=False)
if __name__ == "__main__":
main()
|